
About Casimir & Inanimate Objects
Just search for seller “Casimir,” but I haven’t sold anything there in years. eBay’s policies are not seller-friendly.
I’m a big Batman and DC fan, and I wanted to add to the roster of characters on my shelf. Back in the day, Kenner and Hasbro rarely made characters beyond rainbow-colored Batmen or the occasional off-model villain. And female characters were almost unheard of. So I took it upon myself to “fill in the blanks.” Things have changed in recent years. These days it’s as much about filling in blanks as it is about fine tuning existing sculpts and figures to make them perfect!
Simply put, I make what I like. Most of the pieces on Inanimate Objects are DC or DC-related, but there are a few other lines represented. In a perfect world in which time, space, and money were not limitations, I’d collect a whole lot more! And customize anything that struck my fancy. Alas, I am limited by the laws of physics, just like everyone else.
First, I don’t work in the toy industry. Second, you’ll need a lot of luck. In the past, the large toy manufacturers wanted only people with engineering backgrounds. If you were artistically talented and knew all there was to know about toys, they wouldn’t talk to you. To a degree, I think that’s still true. Things have changed somewhat in recent years, though. Now the large companies are more willing to farm out jobs to independent sculpting studios (like the Four Horsemen), but those studios are few and far between. Even fewer are commercially successful. Update from 2020: I know of a handful of collectors and/or customizers who have broken into the industry. Some are on the “business” side of things. Some actually get into the design side. These lucky folks should be considered the rarest of all unicorns. I wish them all the best! But setting out to be a toy designer is a lot let setting goals to be a YouTube star. Probably best to have a Plan B.
Inanimate Objects has been proudly operating since April, 2003.
Golden age comic books, of course! Specifically, old and beat up ones. When I design something of this nature, I like to start with a general theme and work my way towards the specifics. For this most recent design, I had spent weeks racking my brain for a satisfying concept. Suddenly, I found inspiration had been in front of me all along. On my desk, I have framed a very beat up copy of Detective Comics #247 that belonged to my father in the early fifties. (One of the few that survived from his childhood.) I realized that was the place to start. Even the color pallette was perfect! So I pulled out my many comic book reference tomes and started to pick the golden age elements I wanted to use. The final result is the site as it appears today.

If you mean how long have I made a concentrated effort at making these figures in a consistent size and quality? Since 1995. If you mean in general, since I was old enough to take a screw driver to the back of a G.I. Joe figure.
I keep a running list of characters I’d like to see standing on my shelf. Given the responsibilities of real life, sometimes it can take years to work through a chunk of that list. But some characters jump the line. Maybe a new part of base figure just became available, or a favorite artist just shared a new character design. It really comes down to time and general excitement for a character.
Well, from the initial desire to make the figure to the final product can literally take years. Sometimes I’ll want to make a character, but the means of making it won’t exist yet, or might be too costly at that time. Other times I’ll have a hard time figuring out how to proceed with a project, but months later I’ll have inspiration as to how.
Assuming I have all the materials, the average figure might take a few days to several weeks depending on my interest in the character and interference from real life. Total man-hours spent might range from one to 30, depending on the complexity of the project. As for money, that’s hard to say. As an artist, I keep a large supply of materials on hand at all times. That includes “fodder,” or figures bought with the express purpose of using them in future custom projects. In most instances, I can go to the fodder boxes and pull what I need to start work, without having to purchase anything at that moment.
Since I was old enough to watch TV. I probably learned to read with the words “Pow,” “Bam, and “Crunch.” Of course, this leads to vaguely disturbing memories of not understanding why I got uncomfortable whenever my mother was in the same room and Yvonne Craig was on TV.

Construction
To swap parts, of course!
Most figures consist of two kinds of plastic. ABS is the rigid plastic, usually found in torsos. PVC is more flexible, usually used for heads and limbs. (None of this is true across the board on every figure.) The idea is to soften the PVC in order to separate parts.
If you’re swapping parts made of swivel joints, such as old Hasbro or Mattel animated figure, save yourself some trouble and just slice off the parts and replace the joints with magnets.
If you’re dealing with ball-and-socket joints, hair dryers come in handy in that you can heat up a targeted area, and then the joint may easily pop apart. (I use this method on the Bombshells all the time, especially since many of their parts are compatible between figures.) I’ll apply the heat for about 30 seconds, and then give a firm tug on the part to be removed. Be careful, as you run the risk of stretching the peg. If that starts to happen, stop, and re-evaluate. If it’s going to work, it will likely work well. If it’s not, you’ll know pretty quick.
When it’s time to re-join the parts, I again heat up the target area, usually the piece with a hole for the peg. You want the target area to soften under the heat, not the peg. Simply insert the peg into the target, and you should be good. (If it’s going to work at all.)
I recommend this method over boiling as it doesn’t harm the over structural integrity of the plastic as much, there’s no discoloration, and it’s a lot less messy.
More magnets than you can shake a metal stick at can be found at Applied Magnets. I strongly recommend you order more than you think you need because: 1) They’re cheap. 2) You’ll go through them faster than you think. 3) If you don’t order enough, they’ll slap you with a ridiculous “low quantity” fee. You can actually order more, not suffer the fee, and pay less.
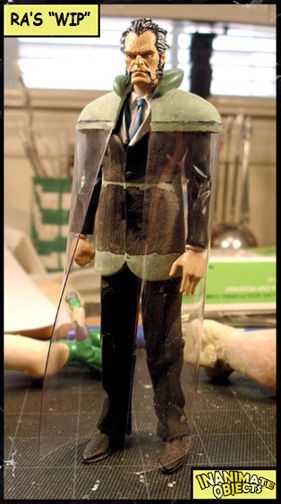
“Wrap and shape” is the technique by which one wraps a figure in a protective layer, such as cellophane, and then adds and shapes a sculpting medium on top. The cured sculpt can then be easily removed from the figure, and the protective layer discarded. This is a great method to create over-the-shoulder capes and mantles. See Classic Ra’s al Ghul and Batman in the gallery.
“Boil and Pop” refers to the act of immersing a plastic figure in boiling water. After about 45 seconds, the softer PVC plastics (usually used in heads and limbs) will soften enough that they can then be “popped” out with a good strong tug. Just to be safe, I use an old pot that won’t be used to cook food.
I only recommend this is as a last resort. Boiling an entire figure can weaken plastic in the long run. Also, unless you plan to paint the whole thing, boiling can discolor some plastics and factory paints.
Every head on every figure is different. There is no one answer to this question. If you’re lucky, the head and body you are matching up will be compatible, and all you have to do is make the swap. But that’s unlikely.
Swivel head joints are tend to be easier. If I need to make a swivel had joint from scratch I’ll use a bit of styrene rod to make a peg, and drill and matching hole. (See the photo below.) If the new peg isn’t quite snug enough I can expand it’s radius by wrapping tape around it.
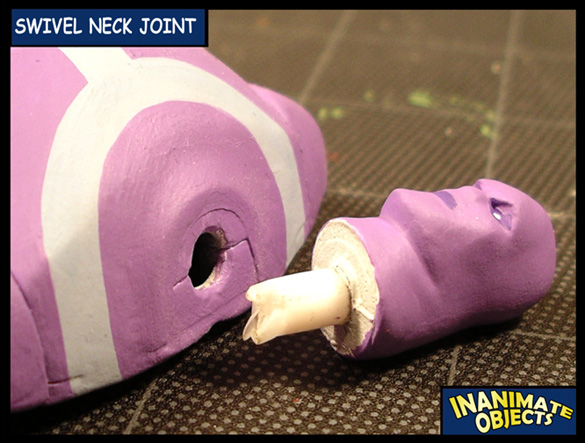
Alternatively… Magnets! (Magnets make great swivel joints.)
Ball-and-socket joints can be messier. There’s often a “dumbell” shaped piece that links the head and neck, or at least a peg with a ball on it. Best case scenario, the swap magically works. Sometimes the fit is there, but the neck is too short or shaped wrong. In those cases, you’ve got to apply your sculpting medium of choice to build up the neck. Maybe the head and peg fit, but the head sits too high. Or the head and peg don’t fit at all. In those cases, you have to get creative. There is no one solution. You might have to remove the “dumbell,” if you can, and blast away the neck. Then re-insert the “dumbell” and rebuild the neck. In some cases the ball-and socket functionality can’t be saved. Then I just resort to making a swivel joint, as outlined above. Again, every scenario is different.
This is a big question. There’s a different answer for every customizer, and for every figure. As the mechanics of almost every figure is different from another, there is no single method.
Lately I’ve switched to using magnets for swivel joints. They’re relatively easy to use, and frankly, they’re fun! I’ll drill shallow holes in either side of a joint and fill with rare-earth magnets. So much easier than making new pegs!
Swapping ball-and-socket arms at the shoulder is tough. I try to avoid it, if possible. (I’ll often swap arms just below the should, either by building a new swivel joint there are just gluing the new part in place.) If you must remove an existing arm at the shoulder, I would start by heating up the area with a hair dryer. I’ve popped out a few Marvel Legends and Bombshells arms that way. But that’s fairly hit or miss. Many customizers will “crack the torso.” Yes, that will give you access to the arms, but whoo-boy, that can create more problems than it solves. Have fun putting that back together and patching all the damage.
I recently had success swapping an arm at the shoulder with a different method. I yanked the existing arm out as much as possible. The joint itself would not come loose, so I drilled into it until there wasn’t much left and it just fell apart. Now I had a torso with a hole in the shoulder, and a new arm with a shoulder peg. I filled the hole on the torso with epoxy, then gently pushed the arm with the peg into the epoxy, and then I let it sit while the epoxy cured. Once solid, the epoxy formed a new socket around the peg. It operates as well as any manufactured piece. (The piece in question is this Joker.)
General Questions
Between work, family, and my own projects, I rarely have the luxury of time for commissions. So chances are, no, I won’t be able to create and sell a custom on demand. (And the existing figures are not for sale.) Alternatively, I hope that my web site will inspire others to try their hand at this satisfying hobby.
I used to answer this question with a long list of links. Sadly, I’ve been at this for so long that most of the sites dedicated to the subject or even a specific artist are long gone. Most folks now have moved their galleries of work to social media platforms. Obviously, I’m still here! But your social media platform of choice is probably your best bet of seeing more customs by other great artists. (And if I post links here, the’ll be obsolete within a day.)
Unfortunately, I am only able to feature my own work at this time.
As with selling my figures, it’s not a matter of money so much as time. I simply don’t have the time to fulfill such requests. I’d be happy to offer advice and tips to those who might like to try custom toy making themselves.
Sorry, but no. I simply don’t have the time or resources to invest in producing more than my share of projects.
Outside of professional requests, I simply don’t have the time to take on commissioned projects.
The shows, the comics… leftover parts. If the Joker shows up in a scene wearing a swimsuit, and I think it’s funny or it’ll look good on the shelf, chances are I’ll make it. Then I think about associations. I can’t remember Harley in a swimsuit in an episode, but a swimsuit Joker needs a swimsuit Harley. So really, there’s no specific place. I simply try to keep an open mind.
I’m always on the lookout for a deal. If I see something on clearance that I feel might be useful, I will usually buy it. Furthermore, I’m always open to new ideas. One never knows when the right base figure or new character design might spark something. To that end, I’ll stock up on figures I know are useful as I find them. I try to keep a working stock of figures and resort to things like eBay as little as possible.
Outside of a specific item for trade, I am not in the habit of releasing my stock figures.
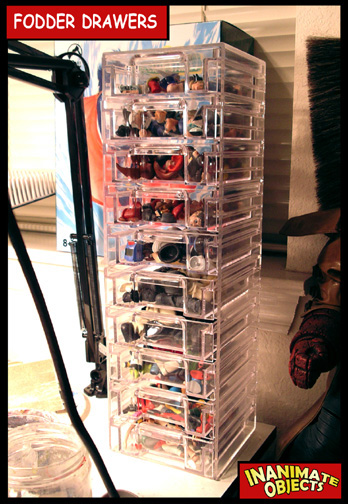
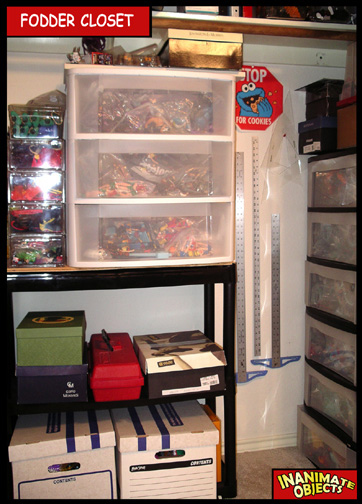
Everyone has their own system and space. On my work desk, I keep a transparent tower of drawers. It’s perfect for small parts like heads, limbs, hats, etc. (Found at the Container Store.) I also maintain a closet that has a good deal of storage capacity. In addition to housing certain parts of my collection, it currently holds several large drawers with semi-transparent faces. Each is organized to hold certain types of figures and body parts. Near it are several medium sized transparent drawers for capes and other accessories. And of course, several shoe and file boxes, each holding a different category of stuff.
One thing to keep in mind: some figures can become terribly warped if left under weights for long periods of time. Make sure those kinds of figures don’t get buried under other figures for too long.
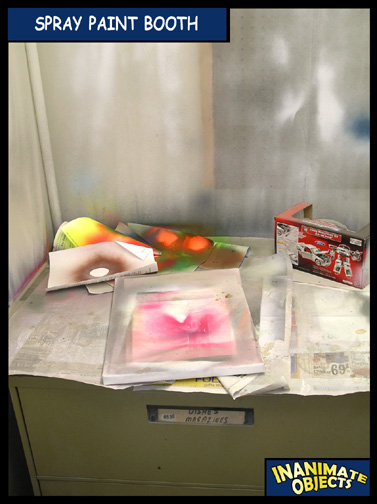
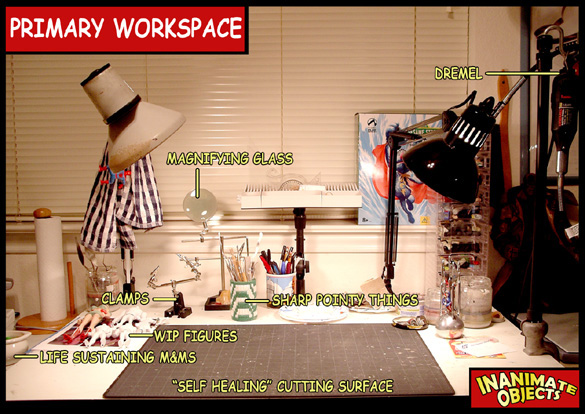
I have several work areas. The main one is my general purpose desk. This is where I do most of the work, including assembly, sanding, Dremeling and painting. This desk is very much specialized towards customizing. I also have a full workshop in the garage for more general construction, and will often utilize power tools for customs when I need them. (God bless the scroll saw!) In the corner of the garage is a unique construct that usually makes guests scratch their heads: a spray booth made from an old Little Mermaid shower curtain. The frame is made from PVC pipe, and inside is an old pattern cabinet (like in the fabric stores) that’s perfect for storing spray paint. The cabinet is 42″ tall, making it the perfect height to use as a work surface. There’s also an old spinning TV stand in there that allows me to rotate figures so I can spray all sides. Across the top is a line of string and clips allowing me to air dry those things that can’t be touching a surface. (Since there’s no vent, I always wear a filtered mask of some kind.)
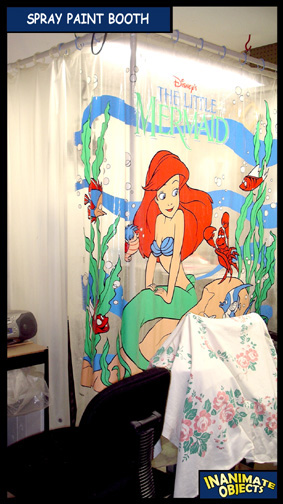
(Whoo-boy, these photos are out of date. I don’t even live in that house anymore. I should update these.)
Action figure photography has exploded as its own sub-genre in the last few years. There are some truly amazing artists out there. You can find most of them on social media.
With that in mind, each one of those artists will recommend a different method. You simply need to pick a place to start and then develop a technique that works best for you.
For my part, I employ a variety of lighting implements, mostly LEDs. Some are small, general are lightz on tripods, others are pucks that can throw light on backgrounds. I still use a couple of old flex-neck desk lamps with 5,000 K fluorescent bulbs. (I turn them into spotlights using old Solo plastic cups.)
As for the camera, I’ve upgraded to a Nikon SLR. Makes a BIG difference from the point-and-shoot days.
Painting
I use Dullcote to bring the various lusters of paint into line with each other. As you might guess by its name, Dullcote’s sheen is flat, not at all shiny. So I will follow with a LIGHT coat of Testor’s Gloss. This give the final effect of a slight shine, not unlike manufactured plastic, thus helping the illusion. But don’t go too heavy with the gloss, as too much tends to remain tacky when used on plastic.
When the figure is fully painted, I apply a coat of Dull Cote first, followed by a very light dusting of Testors semi-gloss. This give the figure just a tiny shine, enough to make it look like manufactured plastic, preserving the illusion!
[Update] Testor’s semi-gloss has become difficult to find. I’m not sure it’s even manufactured anymore. I’ve switched to a light coat of Testor’s gloss, and it works just as well.
I strongly recommend against the use of any enamels. They simply don’t work well with plastic, and they rarely dry fully. Your figure will forever be tacky.
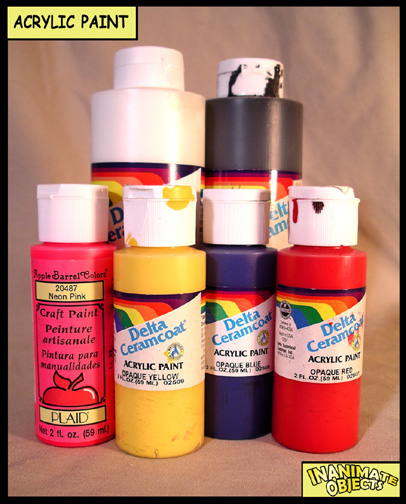
Primarily, I use acrylic paints. Most any acrylics will work fine, be they the $.99 specials or the high-end professional series. Acrylics mix easily, dry quickly, and react well with primer.
Primarily, I use the Ceramcoat brand of acryclics, commonly found in craft stores. I’ve used these since I was a kid. I know some customizers who swear a decent custom cannot be painted with these kinds of acrylics. I feel this site is a testament to the contrary, as everything you see was painted with the “cheap” paints.
I’ve dabbled in the more expensive brands, and found them to be fine paints. But there’s nothing I can do with them that I can’t do with Ceramcoat cheaper.
One additional thought: On rare occasions I’ll start applying a second coat, and the first coat will start to rub off as the second is applied. When that happens, I stop and shoot the figure with Testor’s Dullcote, and then continue painting without a problem. I’m told the more expensive acrylics don’t experience this.
It takes planning and thinking ahead. In general, you want to paint darker colors on top of lighter colors. The quick and dirty solution would be to spray a figure with white primer, and then paint everything on top of that. But that can have some downsides. Maybe you don’t want a thick layer of primer interfering with joints. Or some colors on the figure are fine as is and don’t require repainting? That’s when you have to plan and think.
I rarely apply a solid base of white, as described above. Instead, I’ll apply a “primer” coat of Testor’s Dullcote. This will apply some slight texture to the figure, giving the acrylics something to “latch” onto. (Lots of folks paint without primer of any kind, but I find that water-based paints such as acrylics tend to slide around uncoated plastic, much like water off a duck. Best to give the paint something to bite into.)
If you’re applying a dark color over a lighter color, such as black on yellow, you shouldn’t have too much trouble. But what if you’re applying yellow to… anything? Or even a dark but fairly transparent pigment like red or green? Here’s my trick: I will apply a first coat of “rosy beige” first. (Used to be called “Flesh,” but that is clearly a problematic name at best.) I use the Ceramcoat version, but there are other brands using different names. This tends to be fairly light in tone while still being somewhat opaque. Your yellow/red/green will be much easier to paint on top of this.
I also paint in thin coats. Don’t just glop the stuff on there! Even on top of “rosy beige” a yellow or translucent green can take three or four coats. I usually thin the acrylics with a drop or two of water on my brush. Thin coats might mean you have to apply more coats, but the smooth finish is worth the effort.
I get this question a lot, and the truth is I rarely use a color straight from the bottle/tube. I do try to as often as possible, as the color is easier to reapply later if I need to, but most times I have to mix colors. Unless it’s white, black, “rosy beige,” “opaque” red or “opaque” yellow, then the color is probably mixed.
I recommend using the little paint pots sold at craft stores. I mix up paint, close the lid, and it’s good for a few weeks. Heck, put it in the fridge and it will last even longer.
There are entire books and courses of study devoted to this question. Needless to say, I can’t even begin to scrape the surface here. Assuming you’re already familiar with the color palette of pigment, acrylics mix well together. I usually mix up just as much as I need at a time. With a little patience, you should be able to achieve the color you’re striving for. Just remember acrylics tend to dry a bit darker than what they appear to be in liquid form. Best to try a test on some scrap paper first.
First, make sure you have some tiny, clean brushes that come to a good point. Use only a small dab of paint on the brush. Beyond that, it takes practice, a steady hand, and luck. I often paint an eye poorly, then cover over with a new base coat, and try a second time. Also, for you right-handed folks, the right side of the face is usually more difficult to paint. (And vice-versa.) Don’t forget, to really make your figure’s eyes “pop,” paint them ever so slightly cross-eyed. (Unless you’re painting a “realistic” figure.) That will make the eyes appear focused. Plus, adding a tiny white dot as a highlight helps, too. Also, unless the figure is strictly a “flat” animated design, I often add some gloss over the eyes as a final step.
I always prime a piece before painting. Most of the time I’ll use Testor’s Dullcote as an “invisible” primer. It creates a bit of texture, allowing the paint to “grab” on. Without it, water-based acrylics can react in unexpected ways. On occasion I’ll use a white or grey primer, if I want to cover the whole figure. But I try to avoid that as it’s just one more layer of thickness to deal with in joints.
The reason I always use primer has to do with the bonding agent in acrylic paint. Acrylics are water based, and most of the time I’m at least partially painting on top of plastic, which repels water. To see what I mean, grab a couple of scrap figures or parts. Spray one with Dullcote. Next, water down some paint until it’s fairly thin, more like a wash. Apply the watered-down paint to both test pieces. The paint on the primed piece should apply fairly evenly wherever you apply it. On the unprimed piece, the thin paint will likely pool into spots, like water on a clean glass. The primer allows for greater control over the application of the paint.
Obviously that’s an exaggerated effect. Thicker paint is not as prone to such pooling, but it does still come into play. I prefer to avoid it.
(And don’t forget to spray in a well ventilated area, and/or with a respirator of some kind.)
Most of the time I will prime a figure with Testor’s Dullcote. It acts as an “invisible” primer. But occasionally I will prime with white or grey. In unusual circumstances I might follow with a solid color, depending on the depending on the color scheme at hand. On really rare occasions I’ll mix up a specific acrylic color and apply via airbrush, but I have little patience for that method, so it’s a last resort.
Yes and no. Obviously, you’ll want to use spray primers, as explained above. I’ll sometimes apply spray paint to a large area that requires a single color. However, this can be tricky. It often requires masking off other parts of the figure. Also, most spray colors do not come in a matte or even semi-flat variety. Most are strictly available as glossy, and these rarely dry well on plastic. I’ve had some success using glossy sprays followed by Dullcote, but it’s fairly hit or miss. I usually just buckle down and paint the whole thing with a brush. Besides, mixing paint to match a spray color in case of mistakes is tough!
Dull Cote will become your best friend when you’ve finished a project. It’s a matte sealer produced by Testors. (The company that makes enamel paints for models.) A few sprays of Dull Cote and your figure will have a smooth, even finish. Dull Cote is great for bringing paints of the same color but different luster into line with each other. Dull Cote will even help cure spray paints that refuse to dry. I’ve had good experience with Dull Cote on top of enamel sprays. Naturally, Dull Cote acts a protective sealant. Perhaps most important, though, Dull Cote does not act as a dust magnet, as so many other sealers do. I’ve had figures sprayed with Dull Cote on my shelves for years, and they collect no more dust than they should. Alternatively, I’ve had figures sealed in other brands that become giant dust bunnies in a month.
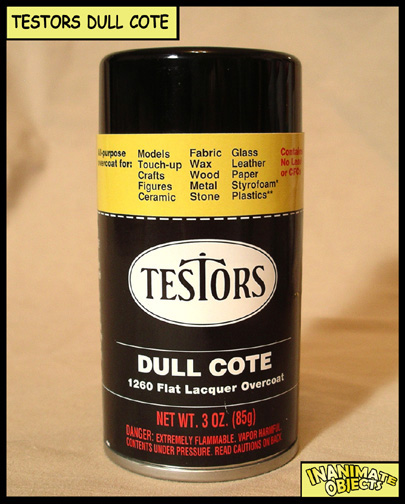
[This photo is old! The label is currently mostly white.]
Dullcote also acts a great primer.
Most hobby stores that carry Testors products will have it. You can also learn more about Dull Cote via the Testors site.
Tools & Materials
I have purchased Pro Create on Amazon.
Pro Create is another epoxy used for sculpting. It’s a two-part mixture that takes about 4 hours to cure. The cured result is much like a tough rubber or plastic. I find it best suited for creating delicate but flexible details like hair. It’s very sticky, but you can help maintain a smooth fining by dipping your fingers or tools in isopropyl alcohol. (Pro Create is oil-based, not water based, so water won’t have the same effect in this case.)
These look like brushes with rubber tips in various shapes. They are indispensable for sculpting! I wish I had found these sooner. They are excellent for shaping details like hair in the sculpting medium of your choice. These are recent additions to my tool kit, but now I can’t work without them!
The black foot-peg stands seen throughout this site were purchased directly from a dealer at a comic book/sci-fi convention many years ago. They can still be found online. DC Direct and NECA have been know to sell their own branded versions.
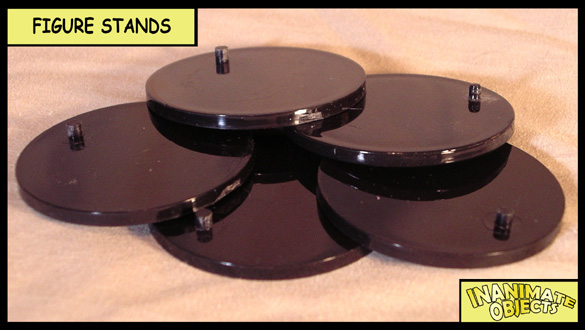
I also use Kaiser brand doll stands. Or sometimes the fancy, articulated stands from Japan. Both can be found online.
Lots of patience. It doesn’t happen at once. Start with some simple projects (repaints) and then take on more difficult chores. Also, I recommend you visit the sites of numerous customizers. Most will give a fairly detailed accounting of the techniques they use, and most are also happy to answer any specific questions you might have.
There is no simple answer to that question, and every customizer will answer differently. Some basics include:
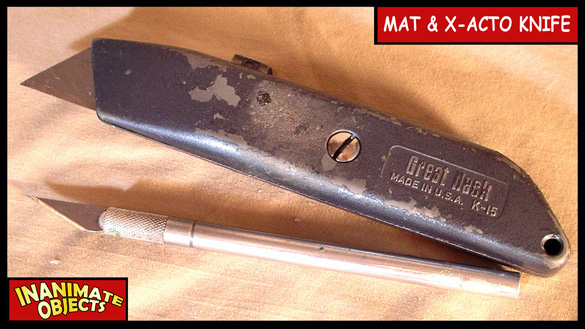
- X-acto knife & mat knife
- Superglue
- Acrylic paints
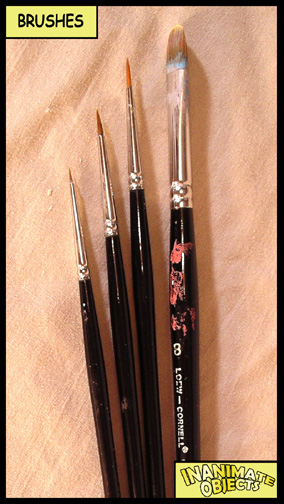
- Paint brushes
- Sculpting medium
- Sandpaper
- Pprimer
Ultimately, one could get by with the above list. However, in the interest of sanity, I highly recommend some or all of the following:
- Dremel
- Magic Sculpt
- Plumber’s epoxy
- Super Sculpey
- Silicone sculpting tools
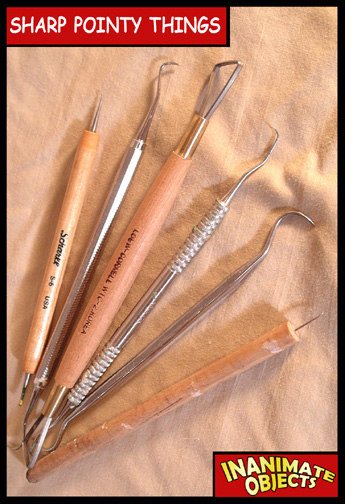
- Various sharp pointy things
- Dullcote
- Access to a computer and printer
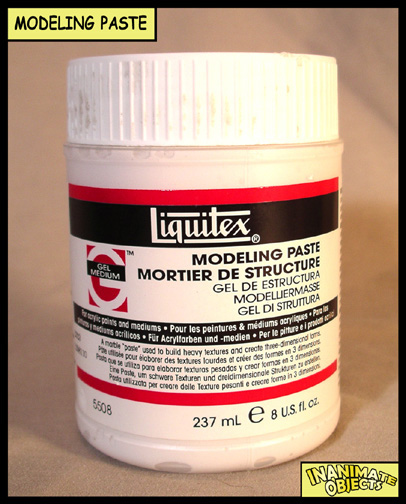
- Modeling paste
- Matte gel medium
- A full range of spray paint colors
- Masking tape
- Drill & drill bits
- Airbrush
These are both fairly common tools, found in hobby, art, and hardware stores. An X-acto knife is a small, fine blade. (Available in a variety of sizes and shapes.) It’s excellent for sculpting and slicing small parts. A mat knife, sometimes called a utility knife or box cutter, is a larger blade that can handle heavier tasks without as much risk of breaking (like slicing through thick plastic).
A Dremel is a marvelous, multi-use tool available in most home improvement stores. It’s a small rotational motor. Dremels are designed to be used with numerous bits serving different purposes. It can act as a drill, a sander, a grinder, a small saw, a polisher, etc. It’s great for eating through areas of unwanted plastic, or cutting though medium-sized chunks. A basic set can start around $75, and is probably the best investment a customizer can make as far as tools are concerned. Easily found at most home improvement stores.
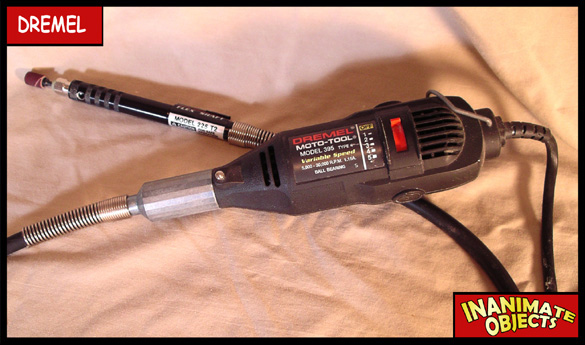
If you can , get the cordless variety. Much less fuss!
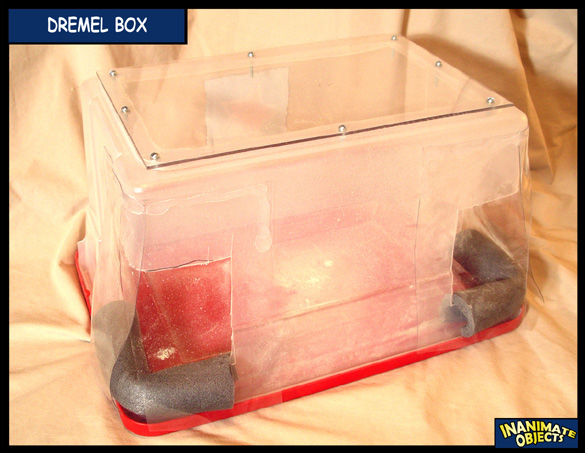
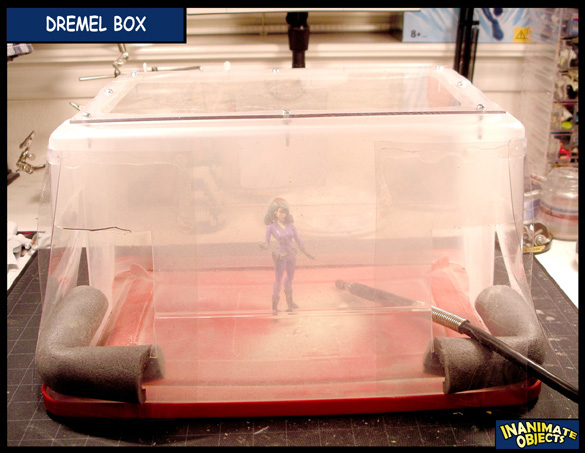
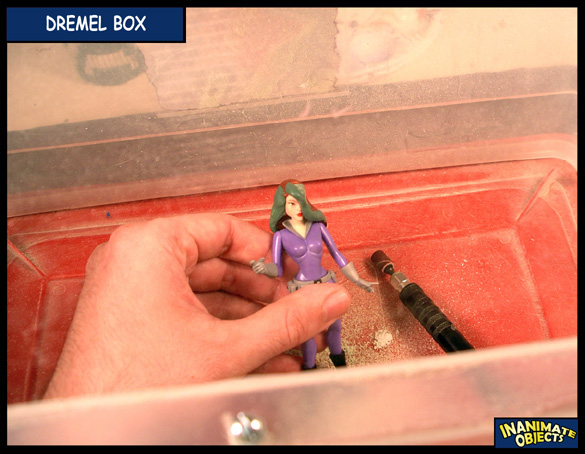
A Dremel box is an ingenious apparatus that allows you to drill and sand without making a huge mess in the room you’re in. Depending on the material being altered, drilling and sanding can produce a lot of debris and dust. A Dremel box keeps most of that contained.
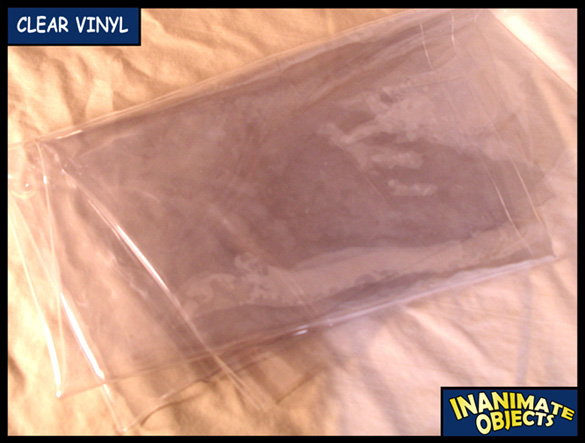
I first saw one used by Bruenor, who himself saw one somewhere else. It’s essentially a transparent or semi-transparent plastic box that’s been turned upside-down. The “top” is cut out and replaced with a piece of Plexiglas for purposes of visbility. On my box, the glass is screwed to the box, with a layer of transparent caulk in-between for a sure seal. Two corners of the box are then cut out and act as arm holes. You can see mine uses pipe insulation to soften the edges, and clear vinyl acts as a debris-drape. I’m able to reach inside with whatever tools and parts I need and Dremel away without fear of dust getting everywhere in my house.
Every substance has its own qualities, be it ABS or PVC plastics, Magic Sculpt or Alumilite, styrene or wood. If I need to remove a large mass of something that can’t simply be cut off with a mat knife or saw, I’ll reduce that mass with the large, coarse sanding drum on the Dremel. Sometimes I’ll use the 1″ upright belt sander in the garage. Usually that’s not needed, so I’ll start with the fine sanding drum. From there, I may go at it with the polishing brush bit, or I might switch to some medium-to-fine sandpaper (I prefer 220). More often than not I’ll go back and forth between paper and bits. When I’m satisfied, I’ll put a final polish on using some extremely fine sandpaper (so smooth it feels almost like normal paper). Some materials sand better than others. It’s just a matter of patience, really. For the record, I hate sanding. But it has to be done.
Kneadatite is a two-part, air-drying compound. It’s primarily designed as a plumber’s epoxy, but artisans have found it to be a great sculpting medium. When mixed, it is pliable and holds its shape. It cures in about four hours with a consistency not unlike PVC plastic. I prefer air-drying over heat-drying mediums as I don’t risk heat damage to the base figures. (Some of my earlier projects were destroyed in the oven while trying to cure Sculpey.) Also, Kneadatite is very durable when dried. It has a slight flexibility that allows it to “give” under pressure without snapping. For more information about Kneadatite, please visit the manufacturer’s site polymerics.com.

I purchase Kneadatite directly from the manufacturer, polymerics.com.
A plumber’s epoxy is any sort of compound that’s used to seal pipe fittings. However, many plumbers epoxies make great sculpting mediums as well. Kneadatite above is but one example. A more typical plumbers epoxy is available at most home improvement stores. It usually dries quickly (5-20 minutes) and has a rock-like texture. I’ve found this to be useful when sculpting large areas or filling large holes that don’t require much detail. It can be sanded smooth and then painted.
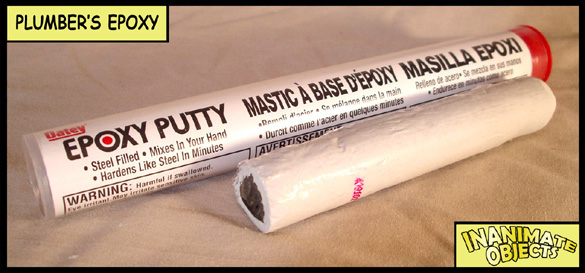
Most hardware and plumbing supply store carry a basic plumber’s epoxy.
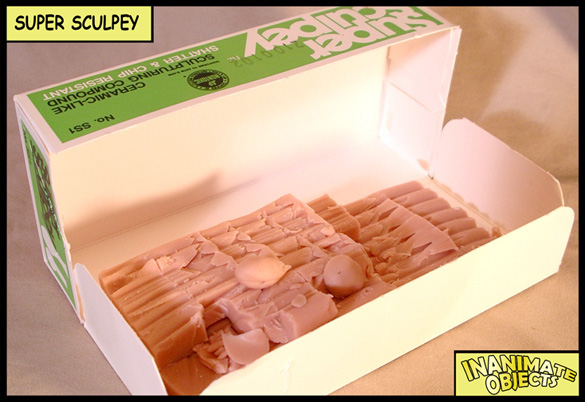
Sculpey and Super Sculpey are popular sculpting mediums easily available at most hobby/craft stores. It requires heat to cure, so the sculpt time is not limited. It allows for very fine detail work (especially Super Sculpey), and is easily shaped. However, once cured it can be very fragile. Don’t drop your Sculpey sculpts!
Curing Sculpey can be a bit of a challenge. A stand-alone Sculpey piece can be place in an oven at 350 degrees for about 15 minutes, and it will harden as expected. But if you are applying Sculpey directly to a plastic figure, you can’t put it in the oven or the plastic figure will melt. Your options at that point are 1) boil the whole piece for about three minutes, or 2) if the new sculpt is thin enough, you can shoot with a hair dryer for 3 or 4 minutes. I prefer the hair dryer, as there’s less risk of damage to the base figure.
(Just to be safe, when boiling Sculpey I use an old pot that won’t be used to cook food.)
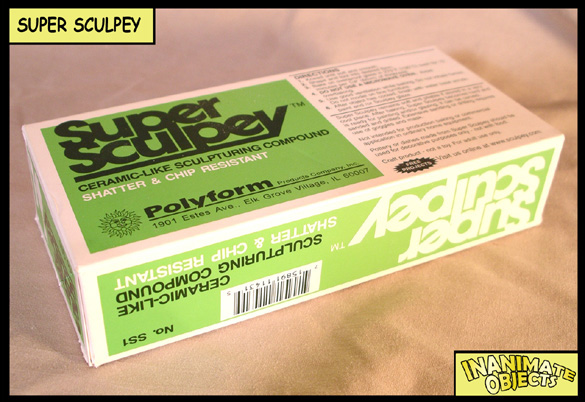
Most art and craft stores carry Sculpey products.
MagicSculpt is yet another two-part sculpting compound, like Plumbers Epoxy. By mixing equal parts of the two dough-like substances, you create a pliable sculpting medium. It takes at least four hours to cure. Cured MagicSculpt is not unlike rock. This is my sculpting medium of choice now. It’s relatively easy to use. It’s durable when cured, and sands easily. It’s also easy to keep smooth, just by keeping your fingers damp with water. It’s great filling in etched lines or small holes, too. I’m told the curing time can be altered by adjusting the ratio of the two components, though I have yet to try this. Magic Sculpt covers 95% of my sculpting needs.
I’ve only bought the stuff online. I’ve never seen it in a store of any kind. I found the best prices tend to be taxidermy suppliers. Most recently I’ve ordered from McKenzie Taxidermy Supply.
Depending on the requirements, I use plumber’s epoxy, MagicSculpt, Pro Create, and Super Sculpey.
Plumber’s epoxy is fairly rough stuff. It’s not easy to sculpt small details with it. Plus, it’s fairly sticky and cures in about five minutes. I use it to fill in large holes.
My primary sculpting medium is Magic Sculpt. There’s not much it can’t do, and solves a lot of problems. It can take small detail well, and can easily be sanded. I go through a lot of this stuff!
I’ll use Super Sculpey sparingly. It’s great for projects that will take a great deal of time (i.e. you can set it down and come back to it days later). My Mxyzptlk was made entirely from Super Sculpey (except the hat). If I’m in a hurry, and feel the fragile nature of Super Sculpey won’t be a risk, I’ll use Super Sculpey on a project and cure it with a hair dryer.
I’ve recently started using Pro Create. It’s more like plastic when cured, less like rock. It’s excellent for creating things like hair or thin details.
Alumilite is a two part liquid compound. When mixed, it turns solid in about three minutes. When solid, it has a consistency very much like ABS (hard) plastic. It can be easily sanded and painted. It’s an excellent casting agent for use with simple molds. A number of the heads you see on my figures are castings from molds using this material. To learn more about Alumilite, please visit alumilite.com.
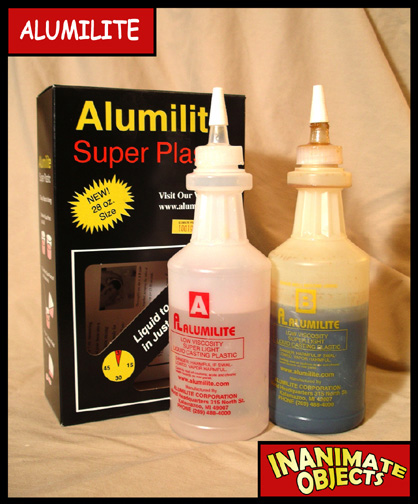
Some art and hobby stores will carry Alumilite. However, I have been known to order directly from the manufacturer, alumilite.com.
I am lousy at making molds! I cannot do this question justice. But the internet is chock full of information about.
When sculpting, you’ll find the best tools are whatever you have at hand. The truth is, you never know what you might need. I keep a selection of old dental picks, pens, letter openers, tooth picks, etc. on hand whenever I’m sculpting. (I recently discovered computer supply stores sell packs of “dental picks.”)
Clear raw vinyl can usually be found at better fabric stores. It’s usually pretty darned cheap, too, especially if you buy the scraps. It’s available in varying thicknesses, so get a wide selection.
Why, for all the great Inanimate Objects downloads, of course! You can print emblems and costume details, as well as some Inanimate Objects playsets.
I’ve also used Photoshop to test ideas by making “virtual” customs. I’ll lay a figure on a scanner and scan an image of the (limb/head/chest/etc.) that I want to match to another scanned figure. This process doesn’t yield 100% results, especially since it only works in two dimensions, but it can give you a good idea of whether a proposed custom will work or not. It might just save you cutting into the costly rare figure!
You can many emblems in the Inanimate Objects downloads section.
If you see something printed in the backdrop of an Inanimate Objects photo that’s not on the download list, drop me an email. I may be able to help.
Modeling paste is a thick liquid that will dry into a chalky, rock like material. It’s useful for some quick fixes and fills, but fairly difficult to use otherwise. Usually available at most art stores near the acrylic paints.
Matte gel medium is acrylic paint without pigment. For my purposes, I use it as an adhesive for applying emblems that I’ve printed.
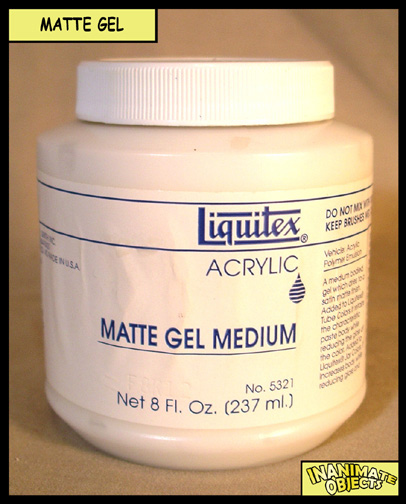
This is known as decoupage, and there are a number of ways to go about this. (There are also many other customizers out there who are higher authorities on this subject.) In general, you’ll want to apply some of the gel medium to the back of the paper emblem, and some to the target area of the figure. Apply the emblem, and then use the brush to smooth out the excess gel medium along the edges. You can even brush the gel medium over the emblem, so as to help the paper conform to the body shape underneath.
One warning: Don’t apply matte gel directly to emblems printed using an ink-jet printer. The ink will smear. Seal the ink with Testor’s Dullcote first, then apply the matte gel. (Laser-printed emblems don’t experience this issue.)
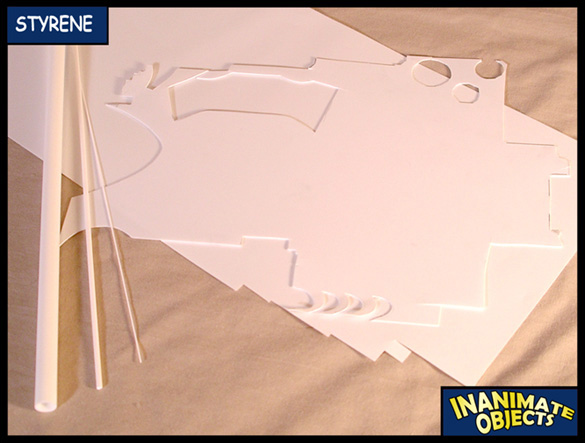
Styrene is a type of plastic, most commonly found in model kits. It’s also available in raw sheets, rods, and tubes, in various sizes and textures. Styrene can usually be found in hobby shops.


 Easy: A simple parts swap. Little if any paint.
 Basic: Some modified parts. Mostly a new paint job.
 Moderate: New and modified parts.
 Skilled: Lots of new and modified parts. “Frankensteining” often involved.
 Advanced: All of the above, plus a great deal of original sculpting.